
Bath House Epoxy Flake Flooring Over Tiles – Douglas Park NSW 2569
A 70 m² bath house floor in Douglas Park upgraded with mechanical tile grinding, two epoxy coats, a custom flake blend and two clear polyaspartic topcoats.
Project Overview
We completed approximately 70 m² of custom epoxy flake flooring for a bath house business in Douglas Park, NSW. The existing tiled floor was mechanically ground using dust-controlled equipment before receiving two coats of 100% solids epoxy, a custom flake blend selected by the owner and two clear polyaspartic protective topcoats.
Project overview
This bath house epoxy flooring project involved upgrading an existing tiled commercial floor rather than coating an ordinary bare concrete slab. The smooth tile surface needed a specific preparation process before any resin could be applied, and we treated the grinding and coating work as one complete system.
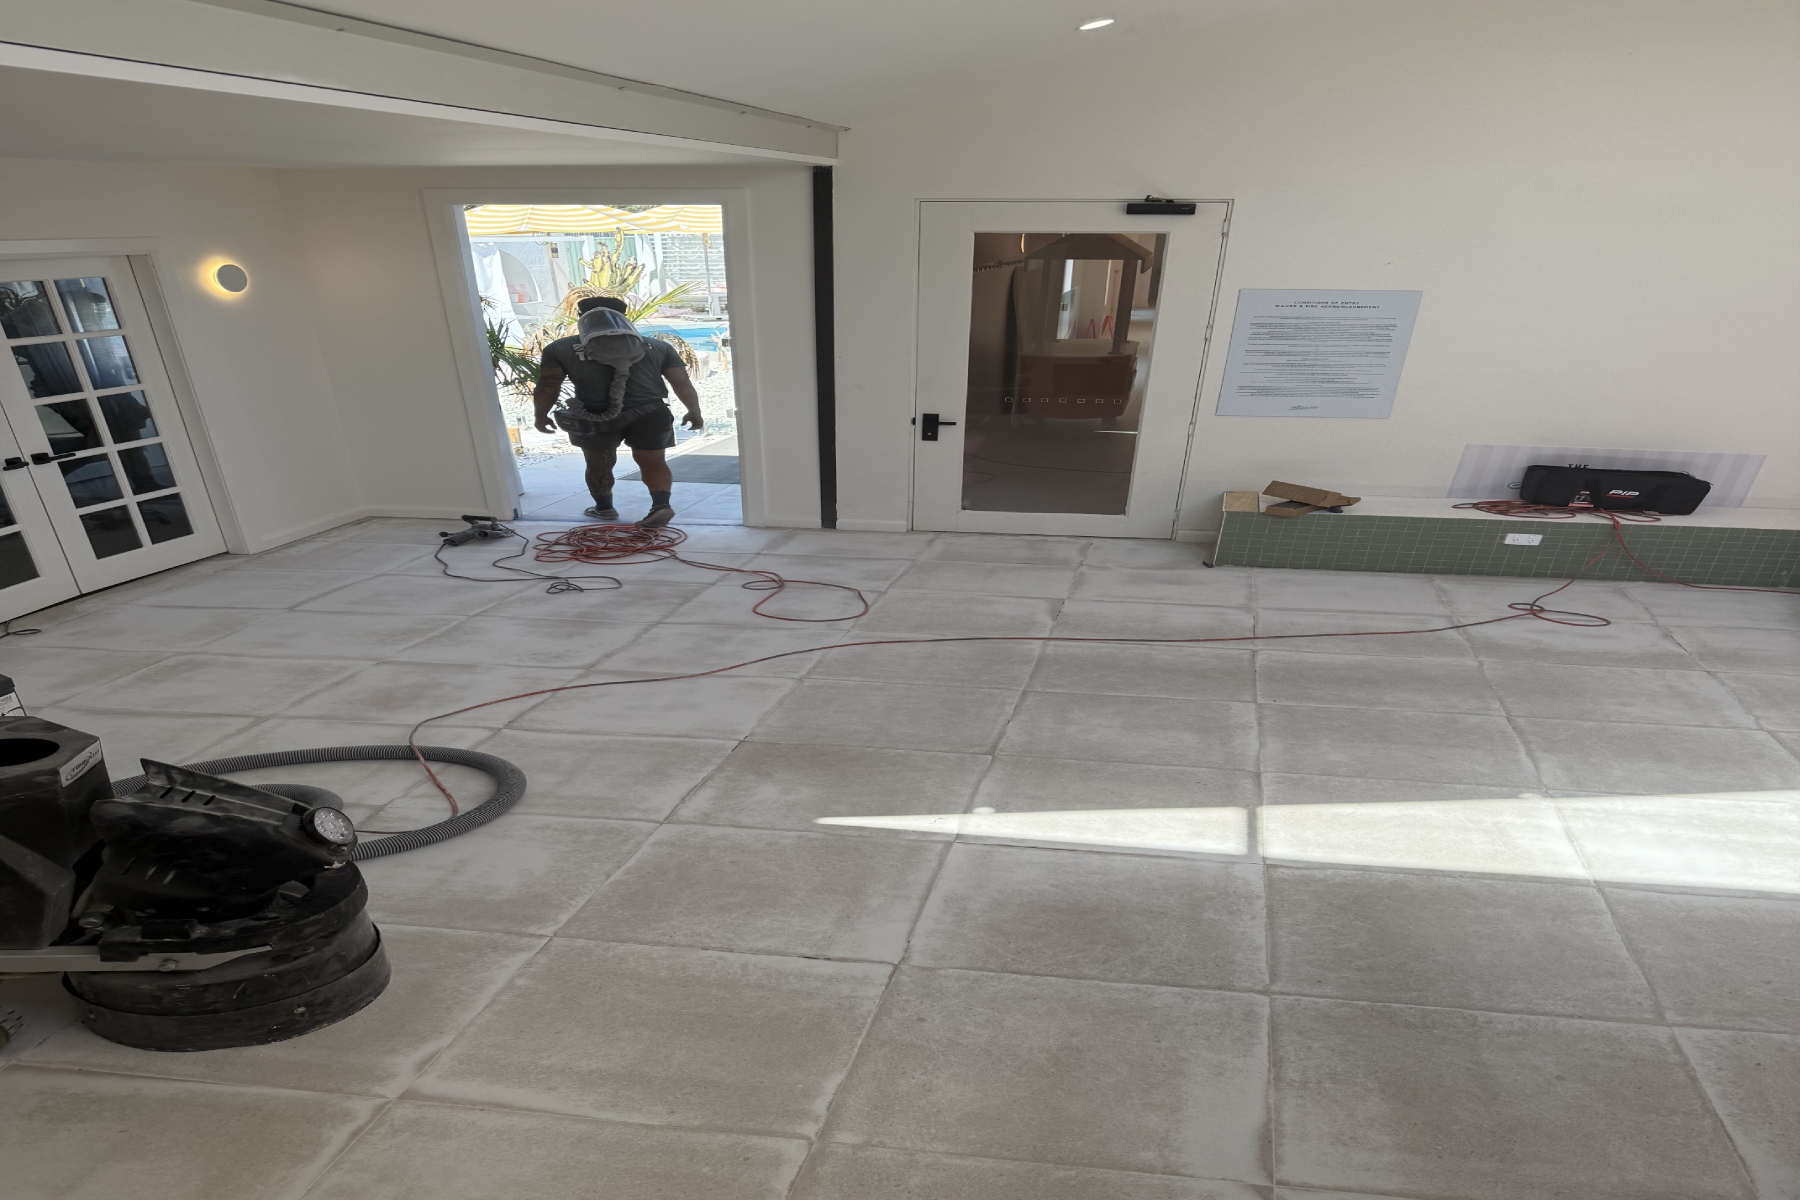
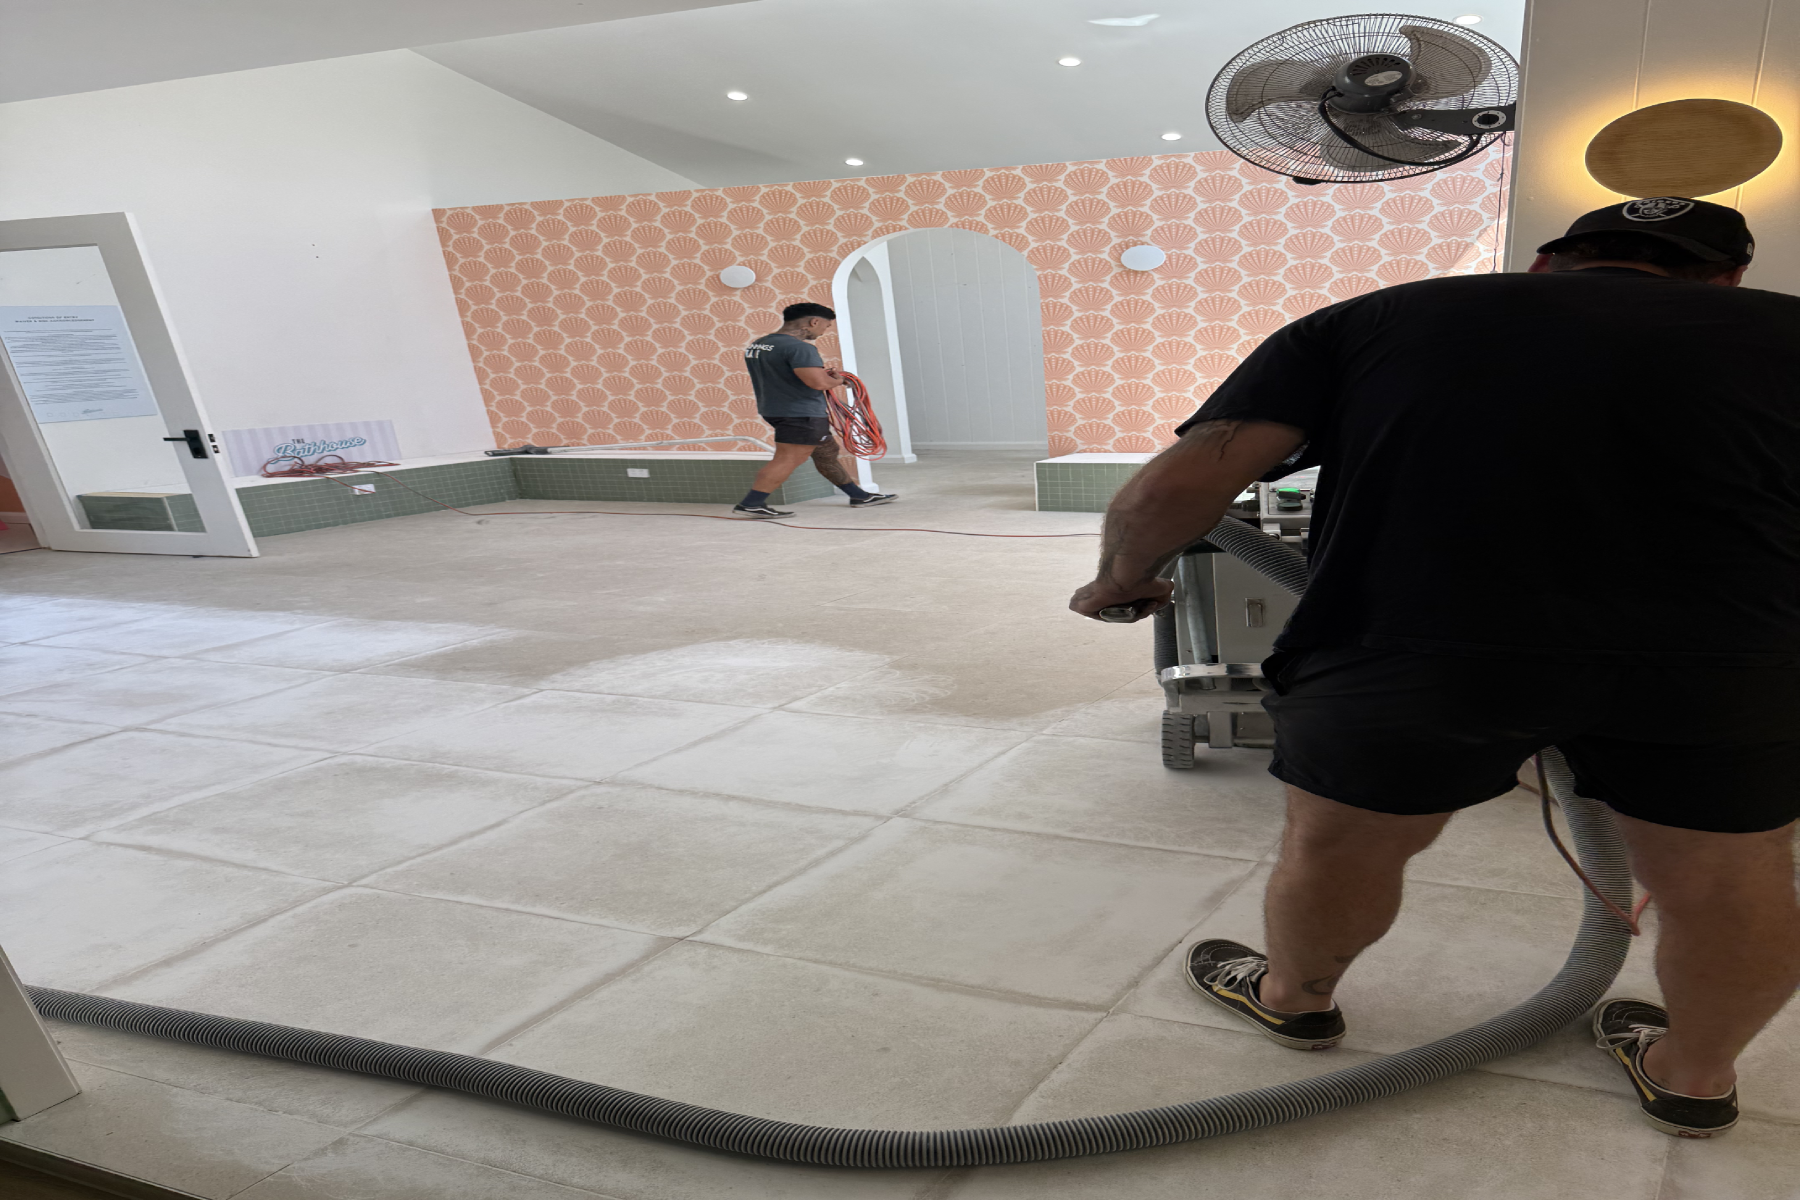
We mechanically ground the tiles to remove the surface sheen and establish a consistent physical profile. Dust extraction was connected to the grinding equipment throughout preparation to capture dust at the source and keep the work process controlled. We then vacuumed and inspected the floor before beginning the resin installation.
The prepared surface received two coats of 100% solids epoxy. The owner's custom decorative flake blend was distributed into the wet second coat, and the completed decorative layer was protected with two clear polyaspartic topcoats. The result is a distinctive, practical commercial surface that is straightforward for the business to sweep, vacuum and mop as part of normal maintenance.
Project facts
- Project: Bath House Epoxy Flake Flooring
- Location: Douglas Park NSW 2569
- Area: Approximately 70 m²
- Substrate: Existing floor tiles
- Preparation: Mechanical tile grinding with connected dust extraction
- Base system: Two coats of 100% solids epoxy
- Decorative finish: Owner-selected custom flake blend
- Protection: Two clear polyaspartic topcoats
- Application: Customer-facing commercial bath house floor
Preparing an existing tiled floor for epoxy
Existing tiles generally have a dense, smooth surface that is not suitable for an epoxy coating without proper preparation. Applying resin directly over an unprepared glossy tile can limit the coating's ability to form a reliable bond with the substrate beneath it.
For this floor, cleaning alone or lightly sanding the surface would not create the physical profile required. We mechanically abraded the tiled area using commercial grinding equipment. The grinding removed the smooth surface finish and produced a consistent profile for the first epoxy coat.
The tiles were not removed. The project was planned around preparing the existing tiled substrate and applying the complete system over it. Our grinder was connected to dust extraction during this work. That did not make the process dust-free, but it helped capture dust at the source and kept the commercial tile surface preparation controlled.
After grinding, we thoroughly vacuumed the area so loose material and grinding dust were not left underneath the coating. We then visually inspected the prepared floor before resin application. The performance of any coating depends heavily on the condition and preparation of the surface underneath it, which is why our mechanical floor preparation and concrete grinding work is planned as part of the coating system rather than an isolated task.
The epoxy flake flooring installation process
1. Existing floor assessment
We began by assessing the existing tiled substrate and the way the work area would be prepared. This was not a bare concrete floor, so the tile surface and its suitability to remain in place had to inform the preparation approach. We did not assume that every tiled floor can be coated in the same way.
2. Mechanical tile grinding
We mechanically ground the tiled surface with commercial floor-preparation equipment. The purpose was to remove the smooth finish and create a consistent physical profile that the epoxy system could bond to. The tiles remained in place throughout the work.
3. Dust-controlled preparation
Dust extraction was connected to the grinding equipment to capture dust close to its source. This helped us keep the preparation process controlled while the grinder travelled across the approximately 70 m² customer-facing area.
4. Detailed cleaning
Once grinding was complete, we thoroughly vacuumed the prepared surface. Dust and loose material can interfere with the coating interface if left on the floor, so cleaning was a separate, deliberate stage rather than an afterthought.
5. Preparation inspection
We visually checked the tile surface after grinding and cleaning. This inspection allowed us to review the prepared profile and the consistency of the work area before applying resin.
6. First 100% solids epoxy coat
The first coat of 100% solids epoxy formed the initial bonding layer over the mechanically prepared tiles. We applied it across the floor as the foundation of the multi-layer system.
7. Second 100% solids epoxy coat
A second 100% solids epoxy coat built a more consistent base and acted as the receiving coat for the decorative finish. The timing of the following flake application was coordinated while this layer was wet.
8. Custom decorative flake application
The business owner selected a custom decorative flake blend to complement the bath house interior. We distributed the flakes into the wet epoxy to create the chosen finish without assigning an invented colour or product name to the blend.
9. Curing and removal of loose flakes
The decorative layer was allowed to cure before loose flake material was removed. The surface was then prepared for the clear protective coats that would seal the decorative system.
10. First clear polyaspartic topcoat
The first clear polyaspartic coat sealed the decorative flakes and began forming the clear wearing surface. It encapsulated the finish and prepared the floor for the final protective layer.
11. Second clear polyaspartic topcoat
We installed a second clear polyaspartic coat to provide further coverage, additional wear protection and a more consistent finished surface for normal commercial use.
12. Final inspection
Before handover, we inspected the completed floor, its edges, transitions and the overall appearance of the coating. This final check brought the preparation and coating stages together as one completed project.
Why two polyaspartic topcoats were applied
Decorative flakes need to be properly sealed beneath a clear wearing surface. On this Douglas Park epoxy flooring project, we applied two clear polyaspartic topcoats over the completed epoxy and flake layer.
The first clear coat sealed the decorative flakes and built the initial protective layer. The second coat added coverage and formed the final day-to-day wearing surface. For the bath house business, the clear coats support regular customer foot traffic, routine cleaning and normal everyday use while preserving the appearance of the owner-selected flake finish.
The topcoats do not make the floor impossible to scratch, stain or damage. Actual performance depends on the condition and stability of the underlying substrate, the type and level of traffic, water exposure, abrasive contamination, cleaning products and methods, furniture or equipment movement, and ongoing care.
The completed bath house floor
The owner's custom flake selection gave the floor an individual appearance that works with the bath house interior rather than presenting like a standard industrial coating. Small variations in flake distribution are a natural part of installing a decorative broadcast finish.
The clear polyaspartic layers sealed the decorative system and provided a practical surface for routine commercial cleaning. The finished floor now forms part of the customer-facing environment while continuing to function as a working commercial surface.
This project demonstrates our ability to combine tile grinding for epoxy with a complete multi-coat installation. Preparation, epoxy, decorative flakes and clear protection were specified as connected stages. You can see more completed floors in our commercial project gallery or review our broader commercial epoxy flooring service.
What to consider before installing epoxy over tiles
Coating over existing tiles can avoid removing the entire tiled surface in some situations, but it is not automatically suitable for every project. The floor should be assessed before a coating system is recommended.
Important considerations include the condition of the tiles, their bond to the underlying substrate, movement, contamination, moisture, the intended use of the area and the preparation standard required by the selected resin system. A mechanically abraded surface creates a better physical profile than cleaning alone, but grinding is not a guarantee against every possible coating failure.
Builders and property owners should also consider edges, transitions and how the coated area connects with adjacent finishes. The proposed cleaning regime and expected traffic matter as well. A site inspection allows these factors to be reviewed before the coating build is confirmed.
Frequently asked questions
Can epoxy flooring be installed over existing tiles?
In some situations, an epoxy flooring system can be installed over existing tiles, but the floor needs to be assessed first. The tiles must be suitable to remain in place, and the surface requires proper mechanical preparation. For this Douglas Park project, we ground the tiled surface before applying the epoxy system.
Why do tiles need to be ground before applying epoxy?
Tiles normally have a smooth and dense surface. Mechanical grinding removes the surface sheen and creates a profile that gives the coating a better surface to bond to. Cleaning alone does not create the same physical profile.
What coating system was used on this bath house floor?
The system consisted of two coats of 100% solids epoxy, a custom decorative flake blend selected by the owner and two clear polyaspartic topcoats.
Why were two polyaspartic topcoats applied?
The first clear coat sealed the decorative flakes. The second added further coverage and formed the final wearing surface. Together, the clear coats protect the decorative layer and make routine cleaning more practical.
Is every tiled floor suitable for an epoxy coating?
No. The condition of the tiles, their bond to the underlying floor, movement, moisture, contamination and the intended use of the area all need to be assessed. A site inspection should be completed before recommending a coating over tiles.
Is an epoxy flake floor maintenance-free?
No floor is completely maintenance-free. The finished surface should be cleaned using suitable products and methods, and abrasive debris should be removed before it is dragged across the coating.
Planning an epoxy floor over existing tiles?
We provide mechanical floor preparation and commercial epoxy flooring across Sydney and surrounding areas. We can inspect the existing substrate, identify the preparation required and recommend a coating build suited to the way the floor will be used. Request a site inspection or project quote.
Have a Floor That Needs This?
Request a commercial floor-preparation assessment for your project scope, access and required handover condition.